So, you’ve got a milk frother. Awesome. You’re already miles ahead of the instant-coffee-and-a-splash-of-cold-milk crowd. But you’ve probably had that moment, right? You froth the milk, it looks okay, but when you pour it, it’s not quite the velvety, cafe-quality microfoam you dreamed of. Your latte art looks more like a Rorschach test than a rosetta. What’s the deal? The secret, my friend, isn’t just in the frother itself, but in the lineup of Milk Frother Accessories Must Have that transform your kitchen counter into a true coffee bar.
Think of it this way: a great chef doesn’t just have a good stove; they have the right knives, pans, and whisks. Your journey to becoming a home barista is no different. These tools aren’t just fancy gadgets; they’re the key to consistency, creativity, and getting that perfect cup, every single time. Let’s dive into the essential gear that will take your coffee game from amateur to artisan.
First, Why Do You Even Need Accessories?
It’s a fair question. Your automatic frother has a whisk, your handheld one spins—isn’t that enough? For a basic frothy coffee, maybe. But if you’re chasing that sublime, silky texture that defines a great cappuccino or latte, you need control. Accessories give you that control over the two most important variables in milk frothing: temperature and texture.
Without them, you’re just guessing. With them, you’re crafting. You’re moving from random chance to repeatable science. That’s the real upgrade we’re talking about.
The Ultimate List of Milk Frother Accessories Must Have
Ready to build your barista toolkit? Here are the non-negotiables and the game-changers that will make a world of difference. We’ll break down what they are, why you need them, and what to look for.
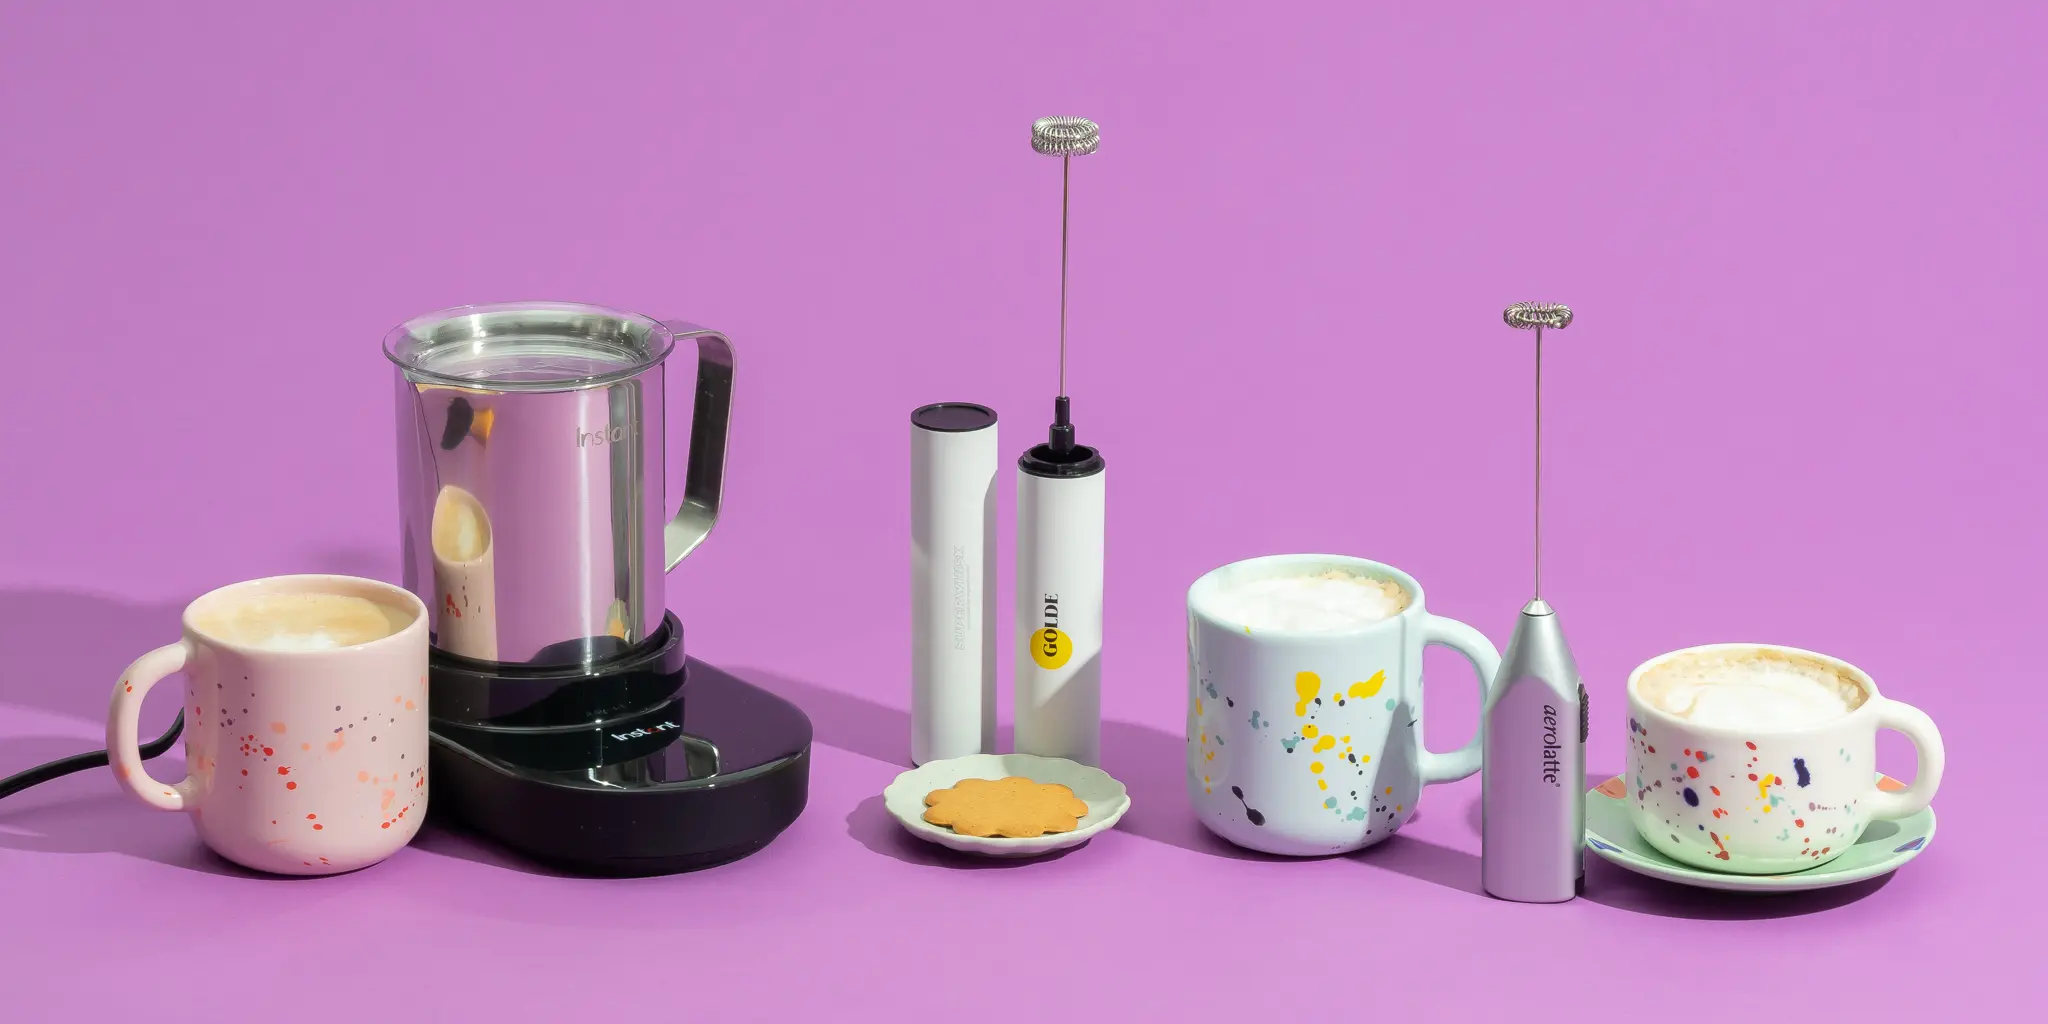
1. The Stainless Steel Frothing Pitcher
If you buy only one accessory, make it this. A dedicated frothing pitcher is the single most important tool for achieving amazing results, especially if you’re using a steam wand or a handheld frother.
Why it’s essential:
- Temperature Conduction: Stainless steel is a fantastic conductor of heat. This allows you to feel the side of the pitcher and know exactly when your milk is reaching the perfect temperature, preventing that dreaded scalded taste.
- The Vortex Effect: The classic shape—wider at the base, tapering towards the top—is specifically designed to help create a swirling vortex as you froth. This motion is crucial for breaking down large air bubbles into silky microfoam.
- The Spout: That pointed spout isn’t just for looks. It’s engineered for precision pouring, which is absolutely critical if you ever want to attempt latte art. Trying to pour detailed designs from a wide-mouthed mug is a recipe for frustration.
What to look for:
- Material: 18/8 or 304 food-grade stainless steel.
- Size: A 12 oz (350ml) pitcher is perfect for single lattes, while a 20 oz (600ml) is better for two drinks or larger mugs.
- Measurement Markings: Interior volume markings are a huge plus for consistency. No more guessing how much milk to pour!
2. The Milk Thermometer
Stop guessing and start knowing. The temperature of your milk is arguably the most critical factor for both taste and texture. Too cold, and it won’t be sweet. Too hot, and the proteins break down, the foam collapses, and you get a sad, burnt flavor.
As seasoned barista Clara Evans from “The Frothy Cup” in Seattle always says, “The sweet spot for milk is a non-negotiable. Most people kill their foam by overheating it. A thermometer takes the guesswork out and gives you perfect results every time. It’s a professional’s best friend.”
Why it’s essential:
- The Sweet Spot: The ideal temperature range for frothing milk is between 140-155°F (60-68°C). In this range, the fats melt and the sugars are at their sweetest, creating a rich, creamy, and flavorful foam.
- Consistency: A thermometer ensures you hit this target on every single drink.
What to look for:
- Clip-on Dial Thermometer: The classic choice. It clips to the side of your pitcher, with the probe submerged in the milk. Look for one with a clearly marked “frothing zone.”
- Digital Instant-Read Thermometer: Faster and often more accurate, but you’ll have to hold it in place. Many pros prefer this for its speed.
3. The Latte Art Pen or Etching Tool
Once you’ve mastered your microfoam, the next frontier is latte art. While the pros can do amazing things with just a pitcher, a latte art pen is the perfect entry point for beginners to get creative.
Why it’s essential:
- Detailing: It allows you to draw fine lines, hearts, leaves, and other designs by etching into the foam and crema.
- Correcting Mistakes: Did your pour not turn out quite right? A pen can help you manipulate the foam into a more intentional design.
What to look for:
- Double-Sided Tools: Many come with a sharp, pointed end for drawing and a small spoon or flat end for manipulating larger areas of foam.
- Good Grip: Look for one that feels comfortable and balanced in your hand.
4. The Cocoa Shaker or Stencil Set
This is the easiest way to add a professional finishing touch to your drinks. It’s simple, effective, and always looks impressive.
Why it’s essential:
- Presentation: A light dusting of cocoa or cinnamon on a cappuccino is classic for a reason. It looks and smells incredible.
- Creativity: Stencils allow you to create perfect shapes—like a coffee bean, heart, or star—on top of your foam with zero artistic skill required. It’s a guaranteed win for impressing guests.
What to look for:
- Shaker: One with a fine mesh lid for an even, delicate dusting. Stainless steel is durable and easy to clean.
- Stencils: Look for a variety pack of food-grade plastic or metal stencils.
|
Our Picks for the Best Milk Frother in 2026
As an Amazon Associate, we earn from qualifying purchases.
|
||
| Num | Product | Action |
|---|---|---|
| 1 | Powerful Milk Frother Wand - Mini Handheld Milk Frother with Stainless Steel Whisk - Battery-Powered Drink Mixer for Coffee, Lattes, Cappuccinos, Matcha - Coffee Enthusiasts Gift - Black |

|
| 2 | Milk Frother Handheld Rechargeable, Frother Wand Drink Mixer Electric Whisk for Coffee, Detachable With 3 Stainless Whisks, Hand Mixer for Lattes, Cappuccino, Matcha, Egg, No Stand, Black |
|
| 3 | Zulay Kitchen Milk Frother Wand Drink Mixer with AA Duracell Batteries- Durable Handheld Milk Frother Electric Whisk - Easy-Clean Milk Frother Wand & Mini Blender - Electric Coffee Frother - Black |
|
| 4 | Maestri House Rechargeable Milk Frother with Stand, LunaFro Handheld Electric Foam Maker Waterproof Detachable Stainless Steel Whisk Drink Mixer Foamer for Lattes, Cappuccino |
|
| 5 | Milk Frother Handheld Battery, Electric Foam Maker Frother Wand, Drink Mixer with Stainless Steel Whisk for Coffee, Matcha, Lattes, Cappuccino Black |
|
| 6 | Bean Envy Milk Frother Handheld for Coffee - Mini Drink Mixer Whisk & Coffee Foamer Wand with Stand for Lattes, Cappuccino, Matcha and Hot Chocolate - Kitchen Gifts - Black |
|
| 7 | Maestri House Rechargeable Milk Frother, LunaFro Mini Handheld Electric Foam Maker Detachable Stainless Steel Whisk Drink Mixer Foamer Mini Blender for Matcha, Lattes, Cappuccino, No Stand |
|
| 8 | Zulay Kitchen Powerful Milk Frother Wand With 2 Duracell Batteries - Ultra Fast Handheld Drink Mixer - Electric Whisk Foam Maker for Coffee, Lattes, Cappuccino, Matcha, Hot Chocolate & Creamer - Black |
|
| 9 | Milk Frother Handheld for Coffee (Foam Maker) Whisk Drink Mixer for Lattes, Cappuccino, Frappe, Matcha, Hot Chocolate |
|
| 10 | YUSWKO Black Handheld Milk Frother Wand for Coffee, Rechargeable Electric Whisk with 3 Heads 3 Speeds Drink Mixer Coffee Frother For Latte, Cappuccino, Hot Chocolate, Egg |
|
How Do I Clean and Care for My Frother and Accessories?
Proper cleaning is non-negotiable for both hygiene and the longevity of your equipment. Milk residue can build up quickly, affecting taste and performance.
Your Step-by-Step Cleaning Guide:
- Immediate Rinse: The golden rule. Rinse your frothing pitcher and frother whisk/wand with hot water immediately after use. Don’t let the milk dry on.
- Pitcher and Tools: Wash with warm, soapy water after rinsing. Most stainless steel pitchers, shakers, and pens are dishwasher safe, but check the manufacturer’s instructions.
- Handheld Frother: Never submerge the motor body in water. Simply turn it on for a few seconds in a glass of hot, soapy water, then rinse the whisk head under running water.
- Automatic Frother: Follow the manufacturer’s guide. Most have a non-stick interior that can be wiped clean with a soft, damp cloth after rinsing. Use a small, soft brush (like a baby bottle brush) to get into the nooks and crannies where the whisk sits.
- Descale if Necessary: If you have hard water, mineral deposits can build up over time. A periodic descaling with a vinegar-water solution can keep your automatic frother working like new.
Frequently Asked Questions (FAQ)
Here are some common questions we get about the gear that supports your frothing habit.
Q: Do I really need a special frothing pitcher? Can’t I just use a mug?
A: You can use a mug with a handheld frother, but you won’t get the best results. A stainless steel pitcher gives you crucial temperature feedback and its shape is designed to create superior microfoam. For latte art, a pitcher’s spout is essential.
Q: What is the single most important accessory for a beginner?
A: Hands down, the stainless steel frothing pitcher. It’s the foundation for good technique. If you can afford a second, make it a thermometer. Getting the temperature and texture right are the two pillars of great frothed milk.
Q: Can I use these accessories with any type of milk frother?
A: Mostly, yes! A pitcher and thermometer are invaluable for steam wands and handheld frothers. A latte art pen and shaker can be used with foam from any device, including automatic frothers. The primary user of a pitcher and thermometer will be someone who isn’t using a fully automated machine.
Q: What’s the best milk for frothing?
A: Whole dairy milk is the easiest to work with and creates a rich, creamy foam due to its fat and protein content. For non-dairy options, “barista blend” oat milk is the reigning champion, frothing up beautifully and tasting fantastic. Almond and soy can also work, but results may vary by brand.
Q: How do I store my milk frother accessories?
A: Keep them clean, dry, and together! Designate a small section of a drawer or a caddy on your counter as your “coffee station.” This keeps everything organized and ready to go for your morning ritual, making the process smooth and enjoyable.
Your Journey to Perfect Foam Starts Now
Stepping up your coffee game is a journey, not a destination. It’s about the small, satisfying ritual of creating something delicious with your own hands. Your milk frother is the engine, but the right Milk Frother accessories must have are the steering wheel, giving you the control to craft the perfect drink.
You don’t need to buy everything at once. Start with a quality pitcher. See the difference it makes. Add a thermometer and taste the improvement. Before you know it, you’ll have a small, effective toolkit that empowers you to make coffee that rivals your favorite cafe. So go ahead, unlock your inner barista. Your morning cup of coffee will thank you for it.