It’s a tale as old as time—or at least as old as the home-cafe trend. You’re ready for your morning masterpiece, a creamy cappuccino or a velvety latte. You reach for your trusty milk frother, and… the whisk is gone. Maybe it slipped down the sink drain, maybe it got misplaced during cleaning, or perhaps it’s just not spinning like it used to. Don’t panic! Learning How To Replace Milk Frother Whisk parts is often surprisingly simple, and we’re here to walk you through it. Before you toss the entire unit and resign yourself to a day of flat coffee, let’s get that little wonder-worker back in action.
First Things First: Why Does a Whisk Need Replacing?
Before we jump into the “how,” let’s quickly diagnose the “why.” Understanding the problem can help you find the right solution and prevent it from happening again. Sound familiar? You’re not alone. I’ve heard from countless coffee lovers who’ve faced the same mini-crisis.
The most common reasons you might need a replacement whisk are:
- It’s Lost: This is the number one culprit. Those tiny magnetic whisks from electric frothers are notorious for making a break for it, often ending up in the garbage disposal or lost in the mysterious depths of a cutlery drawer.
- It’s Damaged: A handheld frother wand can get bent, affecting its balance and frothing power. The delicate spring can also become stretched or warped. For electric models, the magnetic base can weaken over time.
- It’s Worn Out: After hundreds of frothing cycles, the components can simply wear down. You might notice the frother isn’t creating the same quality of microfoam, or the magnetic connection on an electric jug frother has become weak, causing it to rattle or stop spinning.
A Quick Tip from the Pros: Maria Chen, a lead appliance technician with over a decade of experience, notes, “The magnetic element in jug frother whisks can demagnetize slightly with heat and time. If your foam quality drops suddenly, inspect the whisk for wear and tear before you blame the machine itself.”
Identifying Your Frother Type: Not All Whisks Are Created Equal
The first step in finding a replacement is knowing exactly what you’re looking for. The term “milk frother whisk” can refer to a few different things depending on your device. Let’s break down the main categories.
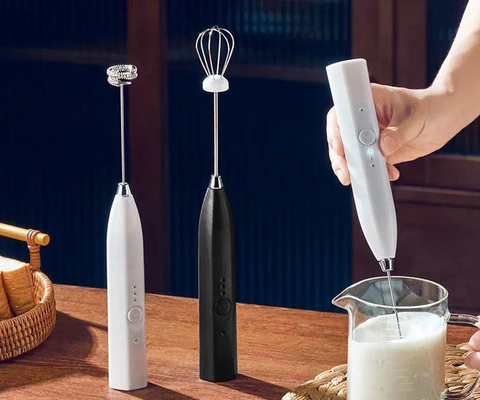
The Handheld Frother Wand
This is the battery-operated magic wand. Its “whisk” is the small, circular spring coil at the end. These are often built into the device and aren’t typically replaceable on their own. If the whisk head on your handheld frother is broken, you’re usually looking at replacing the entire unit. The good news? They are generally the most affordable type of frother.
The Electric Jug Frother (The Most Common Culprit)
This is where most people run into trouble. These countertop machines, like the popular Nespresso Aeroccino or Breville Milk Cafe, use small, free-floating whisks that attach to a post inside the jug via magnets. They often come with two distinct attachments:
- The Frothing Whisk: This one has a circular wire spring around it. It’s designed to incorporate a lot of air to create thick, airy foam for cappuccinos.
- The Heating/Latté Whisk: This is usually just the plastic base without the spring. It’s designed to gently stir the milk while heating it, creating silky microfoam perfect for lattes.
Losing one of these is incredibly common. The key here is to know which one you’re missing and your frother’s exact model.
The Manual Frother Press
This type looks like a small French press. The “whisk” is the mesh plunger screen that you pump up and down to aerate the milk. These screens are quite durable, but they can get bent or clogged. Finding a replacement usually involves searching for parts specific to the brand (like Bodum or Hario).
Your Step-by-Step Guide on How to Replace a Milk Frother Whisk
Alright, you’ve identified your frother and the missing part. Let’s get down to the business of finding a replacement. This process is your roadmap back to delicious, frothy beverages.
- Find Your Frother’s Exact Model Number: This is the most critical step. Flip your frother’s base over. You should find a sticker with a model number, serial number, and brand name. Take a clear photo of it or write it down. Without this, you’re just guessing.
- Go Directly to the Source (The Manufacturer’s Website): Your first and best option is to check the official website of the brand (e.g., Nespresso, Breville, Keurig, Miroco). Look for a “Parts” or “Accessories” section. A quick search for your model number plus “whisk” should lead you to the official replacement part. This guarantees compatibility and quality.
- Search Major Online Retailers: If the manufacturer is out of stock or doesn’t sell parts directly, your next stop is Amazon. Use a very specific search term like:
- “Nespresso Aeroccino 3 replacement whisk”
- “Breville BMF600XL frothing disc”
- “Miroco milk frother whisk”
Read the product descriptions and reviews carefully. Many third-party sellers make compatible parts. Look for reviews from people who have the same model as you to confirm it fits and works correctly.
- Consider a “Universal” Replacement (With Caution): You’ll find listings for “universal milk frother whisks.” These can be a bit of a gamble. While they might work for several off-brand models that use a similar design, they are not guaranteed to fit premium brands with unique magnetic posts. They are a budget-friendly option if you’re willing to take a small risk.
- Installation and Testing: Once your new whisk arrives, installation is usually the easiest part. For an electric jug frother, simply drop the new whisk onto the magnetic post inside. Give it a gentle spin to make sure it’s seated correctly. Then, do a test run with a small amount of milk. Listen for any odd noises and check the foam quality. You should be back in business!
What If You Can’t Find a Replacement Part?
Sometimes, especially with older or less common models, finding a specific part feels like a treasure hunt with no map. If you’ve hit a dead end, here are your options.
- Contact Customer Support: It’s always worth sending an email or calling the brand’s customer service line. They may have unlisted stock or be able to point you in the right direction.
- Evaluate the Cost: If an official replacement whisk costs $15 and you can buy a brand-new, highly-rated frother for $30, it might be time to consider an upgrade. This could be a blessing in disguise, giving you an opportunity to get a machine with new features.
- A Word on DIY: While you might be tempted to rig something up, it’s generally not recommended. The balance, material, and magnetic properties of a whisk are specifically engineered for performance and safety. An improper replacement could damage your machine or fail to produce good foam.
|
Our Picks for the Best Milk Frother in 2026
As an Amazon Associate, we earn from qualifying purchases.
|
||
| Num | Product | Action |
|---|---|---|
| 1 | Maestri House Rechargeable Milk Frother with Stand, LunaFro Handheld Electric Foam Maker Waterproof Detachable Stainless Steel Whisk Drink Mixer Foamer for Lattes, Cappuccino |

|
| 2 | Maestri House Rechargeable Milk Frother, LunaFro Mini Handheld Electric Foam Maker Detachable Stainless Steel Whisk Drink Mixer Foamer Mini Blender for Matcha, Lattes, Cappuccino, No Stand |
|
| 3 | Milk Frother Handheld for Coffee (Foam Maker) Whisk Drink Mixer for Lattes, Cappuccino, Frappe, Matcha, Hot Chocolate |
|
| 4 | Powerful Milk Frother Wand - Mini Handheld Milk Frother with Stainless Steel Whisk - Battery-Powered Drink Mixer for Coffee, Lattes, Cappuccinos, Matcha - Coffee Enthusiasts Gift - Black |
|
| 5 | Zulay Kitchen Milk Frother Wand Drink Mixer with AA Duracell Batteries- Durable Handheld Milk Frother Electric Whisk - Easy-Clean Milk Frother Wand & Mini Blender - Electric Coffee Frother - Black |
|
| 6 | Milk Frother Handheld Rechargeable, Frother Wand Drink Mixer Electric Whisk for Coffee, Detachable With 3 Stainless Whisks, Hand Mixer for Lattes, Cappuccino, Matcha, Egg, No Stand, Black |
|
| 7 | Zulay Kitchen Powerful Milk Frother Wand With 2 Duracell Batteries - Ultra Fast Handheld Drink Mixer - Electric Whisk Foam Maker for Coffee, Lattes, Cappuccino, Matcha, Hot Chocolate & Creamer - Black |
|
| 8 | Milk Frother Handheld Battery, Electric Foam Maker Frother Wand, Drink Mixer with Stainless Steel Whisk for Coffee, Matcha, Lattes, Cappuccino Black |
|
| 9 | Bean Envy Milk Frother Handheld for Coffee - Mini Drink Mixer Whisk & Coffee Foamer Wand with Stand for Lattes, Cappuccino, Matcha and Hot Chocolate - Kitchen Gifts - Black |
|
| 10 | YUSWKO Black Handheld Milk Frother Wand for Coffee, Rechargeable Electric Whisk with 3 Heads 3 Speeds Drink Mixer Coffee Frother For Latte, Cappuccino, Hot Chocolate, Egg |
|
Pro Tips for Protecting Your New Whisk
Now that you’ve gone through the trouble of replacing your whisk, let’s make sure the new one sticks around for a long time.
- Clean Immediately: Rinse the whisk under warm water right after each use. Dried, caked-on milk is much harder to clean and can damage the delicate spring.
- Designate a Safe Spot: Don’t just toss the whisk in the sink. Have a specific small bowl or magnetic spot on the side of your coffee machine where the whisk lives when not in use.
- Check the Dishwasher Instructions: Many whisks are not dishwasher safe. The high heat can warp the plastic and weaken the magnet. Always hand wash unless the manufacturer explicitly says otherwise.
Frequently Asked Questions (FAQ)
Q: Are all milk frother whisks universal?
A: No, they are not. While some third-party whisks may fit multiple generic brands, most major brands like Nespresso and Breville use proprietary designs. Always check your model number to find a compatible replacement whisk.
Q: Can I use my electric milk frother without the whisk?
A: You can use it to heat milk if you have the heating-only attachment (the one without the spring). However, using the machine with no attachment at all will simply heat the milk unevenly without any texture, and it won’t froth.
Q: Why did my magnetic whisk suddenly stop spinning?
A: This could be a few things. First, ensure it’s seated properly on the magnetic post. Second, check for any dried milk residue on the whisk or the post that could be causing friction. Lastly, the magnet in the whisk or the base could be weakening over time, which may require a replacement whisk or a new machine.
Q: I lost the frothing spring but still have the plastic base. What can I do?
A: Unfortunately, the spring is not typically sold as a separate piece. You will need to purchase an entire new frothing whisk assembly (the plastic base with the spring attached).
Q: How do I know if I need the frothing whisk or the heating whisk?
A: The frothing whisk has a wire coil or spring around it and is used for making thick foam for cappuccinos. The heating (or latté) whisk is a flat plastic piece without the spring and is used for creating steamed milk with light foam for lattes.
Losing a tiny part shouldn’t stand between you and your perfect cup of coffee. By correctly identifying your machine and following these simple steps, you can easily find a replacement and get back to your home barista duties. Knowing how to replace Milk Frother whisk parts not only saves you money but also empowers you to maintain your equipment like a pro. So go ahead, find that part, and get ready to enjoy that creamy, dreamy foam once again.