Let’s be real for a moment. You switched to soy milk for your lattes, and you’re loving it. But when you try to recreate that coffee shop magic at home, you’re left with a sad, bubbly mess instead of a velvety, creamy cloud of foam. If you’ve ever wondered how to froth soy milk with a handheld frother and actually get it right, you’ve come to the perfect place. It’s not a lost cause, I promise. In fact, that little battery-powered wand in your drawer is your ticket to a perfect plant-based cappuccino, once you know the secrets. Forget thin, disappointing foam forever. We’re about to turn your kitchen into your favorite new cafe.
Why is Frothing Soy Milk Sometimes a Challenge?
Before we dive into the “how,” let’s quickly cover the “why.” Why does dairy milk often foam up like a dream while soy milk can be… well, a bit stubborn? It all comes down to science, but don’t worry, we’ll keep it simple.
The structure of a good, stable foam relies on two key things: proteins to create the bubbles and fats to stabilize them.
- Dairy Milk: Contains whey and casein proteins, which are fantastic at stretching and trapping air. The fat content helps create a rich, long-lasting foam.
- Soy Milk: Has a good amount of protein, which is great news! However, its protein structure is different from dairy. The fats in soy milk are also different and don’t stabilize the foam in quite the same way.
This is why some soy milks create big, airy bubbles that vanish in seconds, while others just refuse to foam at all. But here’s the secret: not all soy milks are created equal.
The Golden Rule: Choose the Right Soy Milk
If you take only one thing away from this guide, let it be this: your success starts at the grocery store. Using the wrong type of soy milk is like trying to build a house with sand. It’s just not going to work.
What to Look For on the Label:
- “Barista Edition” or “Barista Blend”: This is your holy grail. These versions are specifically formulated for coffee. Manufacturers adjust the protein and fat levels and often add natural stabilizers (like gellan gum) to help create a perfect, silky microfoam that’s ideal for latte art and holds its shape.
- Check the Protein Content: Aim for a soy milk with at least 7-8 grams of protein per serving. Protein is the backbone of your foam, so more is generally better.
- Avoid “Light” or “Low-Fat”: While you might prefer these for your cereal, the lower fat and protein content makes them notoriously difficult to froth. Stick with the full-fat, original versions for the best results.
“The biggest mistake home baristas make is grabbing any old plant milk off the shelf,” says Maria Sanchez, a veteran coffee consultant. “Using a barista-grade soy milk isn’t just a suggestion; it’s the single most important factor for achieving that creamy, integrated texture you get in a professional cafe.”
Your Step-by-Step Guide: How to Froth Soy Milk with a Handheld Frother
Alright, you’ve got your barista-blend soy milk and your trusty handheld frother. Let’s make some magic. This process is all about temperature and technique.
- Start with Cold Milk. Pour your cold soy milk into a tall, narrow cup or a small milk pitcher. Why tall and narrow? It prevents the milk from splashing everywhere once you turn the frother on. Only fill the cup about one-third of the way full—you need to leave plenty of room for the foam to expand.
- Heat it Just Right. Now, heat the milk. You can do this in the microwave or in a small pot on the stove. The ideal temperature is between 140-155°F (60-68°C). If it gets too hot (over 160°F), the proteins will break down, or “denature,” and they’ll lose their ability to hold air. If you don’t have a thermometer, heat it until it’s hot to the touch but not simmering or scalding.
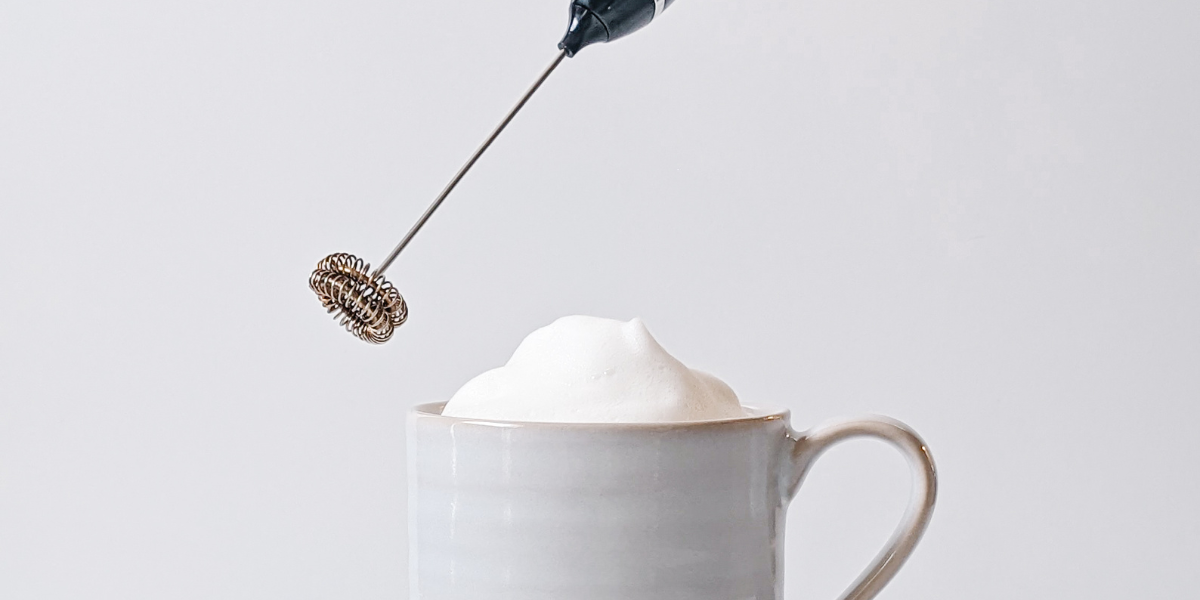
- Position Your Frother. Submerge the whisk head of your handheld frother into the milk, positioning it just below the surface and slightly off-center. Keeping it off-center will help create a swirling vortex, which is key to incorporating air evenly.
- Turn it On and Create the Vortex. Turn the frother on. Keep the whisk head near the top of the milk for the first 5-10 seconds. You’ll hear a light hissing sound as it draws air into the liquid. This is where you’re building the volume.
- Submerge to Stabilize. Once the milk has nearly doubled in volume, lower the frother deeper into the cup. Tilt the cup slightly. Your goal now is to break down the larger bubbles into a uniform, silky microfoam. Keep the frother running for another 15-20 seconds, moving it around gently to keep the vortex going. The milk should be spinning like a tiny, creamy whirlpool.
- Tap and Swirl. Turn off the frother and remove it. Gently tap the bottom of the cup on the counter a few times. This will pop any remaining large bubbles. Now, give the cup a few gentle swirls. This polishes the foam, giving it a beautiful, glossy sheen and blending it perfectly with the warm milk underneath.
You’re done! You should now have a pitcher of beautifully frothed soy milk, ready to pour over your espresso for a perfect latte or cappuccino.
|
Our Picks for the Best Milk Frother in 2026
As an Amazon Associate, we earn from qualifying purchases.
|
||
| Num | Product | Action |
|---|---|---|
| 1 | Powerful Milk Frother Wand - Mini Handheld Milk Frother with Stainless Steel Whisk - Battery-Powered Drink Mixer for Coffee, Lattes, Cappuccinos, Matcha - Coffee Enthusiasts Gift - Black |

|
| 2 | Milk Frother Handheld Battery, Electric Foam Maker Frother Wand, Drink Mixer with Stainless Steel Whisk for Coffee, Matcha, Lattes, Cappuccino Black |
|
| 3 | Milk Frother Handheld for Coffee (Foam Maker) Whisk Drink Mixer for Lattes, Cappuccino, Frappe, Matcha, Hot Chocolate |
|
| 4 | Maestri House Rechargeable Milk Frother with Stand, LunaFro Handheld Electric Foam Maker Waterproof Detachable Stainless Steel Whisk Drink Mixer Foamer for Lattes, Cappuccino |
|
| 5 | Maestri House Rechargeable Milk Frother, LunaFro Mini Handheld Electric Foam Maker Detachable Stainless Steel Whisk Drink Mixer Foamer Mini Blender for Matcha, Lattes, Cappuccino, No Stand |
|
| 6 | Zulay Kitchen Powerful Milk Frother Wand With 2 Duracell Batteries - Ultra Fast Handheld Drink Mixer - Electric Whisk Foam Maker for Coffee, Lattes, Cappuccino, Matcha, Hot Chocolate & Creamer - Black |
|
| 7 | Bean Envy Milk Frother Handheld for Coffee - Mini Drink Mixer Whisk & Coffee Foamer Wand with Stand for Lattes, Cappuccino, Matcha and Hot Chocolate - Kitchen Gifts - Black |
|
| 8 | Zulay Kitchen Milk Frother Wand Drink Mixer with AA Duracell Batteries- Durable Handheld Milk Frother Electric Whisk - Easy-Clean Milk Frother Wand & Mini Blender - Electric Coffee Frother - Black |
|
| 9 | YUSWKO Black Handheld Milk Frother Wand for Coffee, Rechargeable Electric Whisk with 3 Heads 3 Speeds Drink Mixer Coffee Frother For Latte, Cappuccino, Hot Chocolate, Egg |
|
| 10 | Milk Frother Handheld Rechargeable, Frother Wand Drink Mixer Electric Whisk for Coffee, Detachable With 3 Stainless Whisks, Hand Mixer for Lattes, Cappuccino, Matcha, Egg, No Stand, Black |
|
Troubleshooting: What to Do When Things Go Wrong
Even with the best instructions, sometimes things don’t go as planned. If you’re struggling to get that perfect foam, here are a few common problems and how to fix them.
Problem: My foam is just a layer of big bubbles on top.
This usually means you spent too much time frothing near the surface and not enough time submerging the whisk to create the microfoam.
- The Fix: Next time, once you see the volume increase, lower the frother deeper into the milk sooner. Focus on creating that smooth, swirling vortex to break down the bubbles. Tapping and swirling at the end is also crucial for this.
Problem: The foam disappears almost immediately.
This can be caused by a few things: the milk was too hot, the soy milk isn’t a barista blend, or the carton has been open for too long.
- The Fix: Double-check your milk temperature. Make sure you’re using a fresh, high-quality barista edition soy milk. Plant-based milks can lose some of their frothing power after being open in the fridge for several days.
Problem: I can’t seem to get any volume at all.
- The Fix: Make sure you’re starting with cold milk before heating. Also, ensure your frother’s batteries are fresh. A weak, slow-spinning frother won’t have the power to incorporate enough air. You can also try frothing the milk cold first to incorporate air, and then heating it gently in the microwave.
Beyond Coffee: Creative Uses for Your Frothed Soy Milk
Your handheld frother is more versatile than you think! Now that you’ve mastered soy milk, try using it for:
- Matcha Lattes: Froth your soy milk and pour it over your prepared matcha shot.
- Creamy Hot Chocolate: Add cocoa powder to your milk before heating and frothing for the richest hot chocolate ever.
- London Fog: Pour frothed soy milk over strongly brewed Earl Grey tea with a touch of vanilla syrup.
- Golden Milk Lattes: Froth with turmeric, ginger, and cinnamon for a cozy, anti-inflammatory treat.
Keeping Your Frother Clean and Ready
The best part about a handheld frother is how easy it is to clean. Don’t just toss it in the sink.
- Immediately after use, rinse the whisk head under hot running water.
- Fill a cup with hot, soapy water.
- Submerge the whisk and turn it on for about 10 seconds.
- Rinse it again with clean water, give it a quick spin to dry, and it’s ready for next time.
Properly cleaning your frother ensures it will last for years and won’t have any leftover milk residue.
Frequently Asked Questions (FAQ)
Q1: Can you froth cold soy milk with a handheld frother?
Yes, you absolutely can! Frothing cold soy milk will create a light, airy cold foam that’s perfect for topping iced lattes and cold brew. The texture will be lighter than hot foam, but it’s delicious and refreshing.
Q2: Why isn’t my “barista blend” soy milk frothing properly?
If you’re using a barista-grade milk and it’s still not working, the most likely culprits are temperature (too hot) or an old carton. Make sure the milk is fresh and that you’re heating it to the 140-155°F (60-68°C) sweet spot.
Q3: How long does it take to froth soy milk with a handheld frother?
It’s incredibly fast! The entire process, from incorporating air to stabilizing the microfoam, should only take about 20-30 seconds. If it’s taking longer, your frother’s batteries might be running low.
Q4: Does the brand of soy milk really make a difference?
Yes, it makes a huge difference. Brands like Pacific Foods, Oatly (their oat milk is a frothing champion, but their principle applies), and Califia Farms offer excellent barista blends that are designed specifically for this purpose. Experiment to find your favorite.
Q5: Can I use a handheld frother to mix other things besides milk?
Definitely. A handheld frother is fantastic for mixing protein powders or collagen into water, whipping up eggs for an omelet, or emulsifying salad dressings. It’s a surprisingly versatile little kitchen tool.
Your Home Barista Journey Starts Now
Mastering how to froth soy milk with a handheld frother is a simple skill that completely elevates your at-home coffee experience. It bridges the gap between a standard cup of coffee and a luxurious, cafe-quality latte. All it takes is the right milk, the right temperature, and a few seconds of technique.
So go ahead, grab your frother and that carton of barista-blend soy milk. Your perfect, creamy, plant-based beverage is just a minute away. Give it a try and transform your morning ritual for good.