Let’s be real, that 7 AM walk to the campus coffee shop in the middle of winter is brutal. And the dent it leaves in your student budget? Even more so. But what if I told you that you could whip up a café-quality latte, a dreamy cappuccino, or a velvety hot chocolate right from the comfort of your own desk? If you’re looking to seriously upgrade your dorm room beverage game, the first step is to buy a compact milk frother for dorm living. It’s a small tool that delivers a huge upgrade, turning your basic instant coffee into a luxurious experience.
This isn’t just about making coffee. It’s about creating those small moments of comfort and indulgence that make student life a little bit easier. It’s about saving money you could be spending on, well, anything else. Forget the watery coffee and sad-looking hot cocoa. We’re here to guide you through everything you need to know to find, use, and love the perfect space-saving milk frother.
Why You Absolutely Need a Milk Frother in Your Dorm
Think a milk frother is an unnecessary gadget? Think again. For a student, it’s a game-changer. It’s the single fastest way to elevate your morning routine, save cash, and even make your room the go-to spot for a study session with friends.
- Budget-Friendly Luxury: A five-dollar latte every day adds up fast. With a one-time purchase of a frother, you can recreate that experience for pennies a cup.
- Instant Upgrade: That instant coffee you’ve been tolerating? Add a cloud of frothed milk, and suddenly it’s a respectable “dalgona-style” coffee. It makes even the most basic ingredients feel special.
- Tiny Footprint, Big Impact: We know dorm room real estate is precious. Compact milk frothers are designed to be tiny, easily fitting into a drawer or a small corner of your desk.
- More Than Just Coffee: As you’ll see later, these little powerhouses can do so much more than just froth milk for your morning brew.
What Are The Different Types of Milk Frothers?
Walking into the world of milk frothers can feel a little overwhelming, but they mostly fall into three categories. Understanding the difference is key to finding the right fit for your dorm room lifestyle.
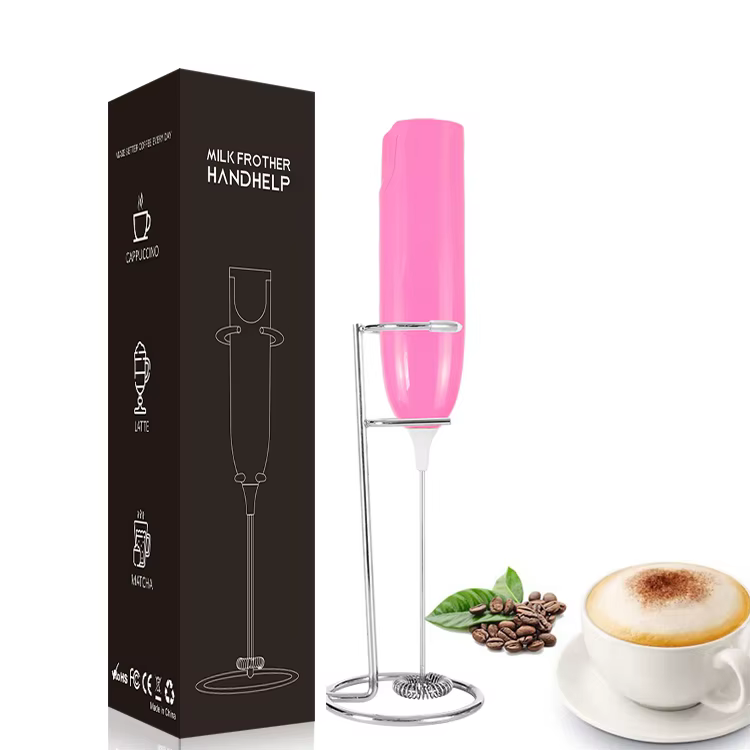
The Speedy Handheld Whisk
This is the quintessential dorm room frother. It’s essentially a tiny, battery-powered whisk. You just dip it into your warm milk, press a button, and voilà—froth in under 30 seconds.
- Pros: Incredibly small and portable, super affordable, and ridiculously easy to clean.
- Cons: Requires you to heat your milk separately in a microwave, and the foam quality depends a bit on your technique.
The Automatic Electric Jug
These are the all-in-one workhorses. You pour cold milk in, press a button, and it heats and froths the milk for you, shutting off automatically when it’s done.
- Pros: Creates consistently perfect foam (hot or cold), totally hands-off, and some models can just heat milk without frothing.
- Cons: Significantly larger than handheld models, more expensive, and cleaning involves more than a simple rinse.
The Classic Manual Press
Think of a small French press, but for milk. You pour in warm milk and pump a plunger up and down to manually create the foam.
- Pros: No electricity or batteries needed, gives you complete control over the foam texture.
- Cons: Requires the most physical effort, and there’s a definite learning curve to get it right.
| Feature | Handheld Frother | Automatic Jug | Manual Press |
|---|---|---|---|
| Footprint | Tiny (fits in a drawer) | Small (like a travel mug) | Medium (like a small French press) |
| Power | Battery-Operated | Electric (plugs in) | Manual (your own power!) |
| Ease of Use | Very Easy | Easiest (press a button) | Moderate (requires technique) |
| Best For | The student on a budget who values space above all else. | The student who wants ultimate convenience and perfect results every time. | The coffee purist who enjoys the hands-on process. |
How to Buy a Compact Milk Frother for Dorm Success
Okay, you’re convinced. But with so many options, how do you pick the right one? When your main goal is to buy a compact milk frother for dorm use, you need to prioritize a few key things.
- Size and Storage: This is non-negotiable. Look at the dimensions. Can it be tucked away easily? Handheld frothers are the clear winner here, often coming with a small stand or case that takes up minimal desk space.
- Power Source: Do you have easy access to an outlet, or would a battery-powered device be more convenient? For pure portability and ease of use anywhere in your room (or even the common room), battery-operated handhelds are tough to beat.
- Noise Level: This is a big one if you have a roommate. You don’t want to be waking them up with a device that sounds like a mini jet engine. Most handheld frothers are relatively quiet, but it’s worth checking reviews for comments on noise.
- Ease of Cleaning: Let’s be honest, you’re not going to use something that’s a pain to clean in a tiny dorm sink. The best frothers for students can be cleaned in seconds by simply running the whisk under hot water with a drop of soap.
- Your Budget: You can get a fantastic handheld frother for less than the cost of four fancy lattes. While automatic frothers are pricier, they can be worth it if you value convenience. Set a budget and stick to it.
Your Step-by-Step Guide to Perfect Froth
You’ve got your new frother. Now what? Making perfect foam is an art, but it’s a really easy one to learn.
- Choose Your Milk: Whole milk froths like a dream due to its fat content. For non-dairy, oat milk (especially barista blends) and soy milk are excellent alternatives.
- Heat It Up (But Don’t Boil It!): Pour your milk into a microwave-safe mug, leaving plenty of room for it to expand. Heat it for about 45-60 seconds. You want it to be hot, not scalding. The ideal temperature is around 150°F (65°C).
- Get the Angle Right: Tilt your mug slightly. This helps create a swirling vortex, incorporating air more evenly.
- Froth Away: Submerge the head of your handheld frother just below the surface of the milk and turn it on. As the foam starts to build, slowly lower the frother deeper into the mug to froth the rest of the milk. This should only take about 20-30 seconds.
- Tap and Swirl: Once you’re done, gently tap the mug on the counter a few times to break up any large bubbles. Give it a little swirl to incorporate the foam into the milk for that perfect microfoam texture.
- Pour and Enjoy: Slowly pour your beautiful frothed milk over your espresso, coffee, or hot chocolate base.
Pro Tips from the Pros: Secrets to Barista-Level Foam
Want to take your skills to the next level? We’ve got a few tricks up our sleeve.
“The biggest mistake beginners make is overheating the milk. Once it gets too hot, the proteins denature and won’t hold air, leaving you with sad, flat foam. Always aim for ‘too-hot-to-sip’ but not boiling.” – Chloe Davis, Lead Barista and Coffee Educator
- Start with Cold Milk: Always use milk straight from the fridge. Cold milk gives you more time to introduce air before it gets too hot, resulting in a finer, more stable foam.
- The Vortex is Key: Don’t just stick the frother in the middle. Place it slightly off-center and near the surface to create that perfect whirlpool. This technique, used by baristas worldwide, is what creates silky microfoam instead of big, soapy bubbles.
- Don’t Over-Froth: It’s tempting to keep going, but over-frothing can make the foam stiff and dry. Stop when the volume has roughly doubled and the texture looks smooth and glossy.
|
Our Picks for the Best Milk Frother in 2026
As an Amazon Associate, we earn from qualifying purchases.
|
||
| Num | Product | Action |
|---|---|---|
| 1 | Bean Envy Milk Frother Handheld for Coffee - Mini Drink Mixer Whisk & Coffee Foamer Wand with Stand for Lattes, Cappuccino, Matcha and Hot Chocolate - Kitchen Gifts - Black |

|
| 2 | Powerful Milk Frother Wand - Mini Handheld Milk Frother with Stainless Steel Whisk - Battery-Powered Drink Mixer for Coffee, Lattes, Cappuccinos, Matcha - Coffee Enthusiasts Gift - Black |
|
| 3 | Zulay Kitchen Milk Frother Wand Drink Mixer with AA Duracell Batteries- Durable Handheld Milk Frother Electric Whisk - Easy-Clean Milk Frother Wand & Mini Blender - Electric Coffee Frother - Black |
|
| 4 | YUSWKO Black Handheld Milk Frother Wand for Coffee, Rechargeable Electric Whisk with 3 Heads 3 Speeds Drink Mixer Coffee Frother For Latte, Cappuccino, Hot Chocolate, Egg |
|
| 5 | Maestri House Rechargeable Milk Frother with Stand, LunaFro Handheld Electric Foam Maker Waterproof Detachable Stainless Steel Whisk Drink Mixer Foamer for Lattes, Cappuccino |
|
| 6 | Zulay Kitchen Powerful Milk Frother Wand With 2 Duracell Batteries - Ultra Fast Handheld Drink Mixer - Electric Whisk Foam Maker for Coffee, Lattes, Cappuccino, Matcha, Hot Chocolate & Creamer - Black |
|
| 7 | Milk Frother Handheld for Coffee (Foam Maker) Whisk Drink Mixer for Lattes, Cappuccino, Frappe, Matcha, Hot Chocolate |
|
| 8 | Milk Frother Handheld Rechargeable, Frother Wand Drink Mixer Electric Whisk for Coffee, Detachable With 3 Stainless Whisks, Hand Mixer for Lattes, Cappuccino, Matcha, Egg, No Stand, Black |
|
| 9 | Milk Frother Handheld Battery, Electric Foam Maker Frother Wand, Drink Mixer with Stainless Steel Whisk for Coffee, Matcha, Lattes, Cappuccino Black |
|
| 10 | Maestri House Rechargeable Milk Frother, LunaFro Mini Handheld Electric Foam Maker Detachable Stainless Steel Whisk Drink Mixer Foamer Mini Blender for Matcha, Lattes, Cappuccino, No Stand |
|
Beyond the Latte: What Else Can Your Frother Do?
Your compact milk frother is far more versatile than you think. It’s a true multi-tasker for dorm room cooking.
- Matcha Lattes: Perfectly blend matcha powder into water or milk, eliminating all clumps for a smooth, vibrant green tea latte.
- Deluxe Hot Chocolate: After heating your milk and cocoa mix, give it a quick froth. It emulsifies the cocoa powder and creates an incredibly rich, airy texture.
- Protein Shakes: Hate clumpy protein powder? A milk frother will blend your post-workout shake into a smooth, drinkable consistency in seconds.
- Light & Fluffy Eggs: In a pinch, you can even use it to whip a single egg for the fluffiest dorm-room scrambled eggs you’ve ever had.
Keeping It Clean: The 60-Second Dorm-Friendly Cleanup
This is the best part. Cleaning a handheld frother is almost instant.
- Fill a cup with hot water and a small drop of dish soap.
- Submerge the whisk in the soapy water and turn it on for 10 seconds.
- Rinse the whisk under clean, running water.
- Briefly turn it on one last time to spin it dry. That’s it. You’re done.
Frequently Asked Questions
What is the best type of compact milk frother for a dorm?
For most students, a battery-operated handheld frother is the ideal choice. It’s incredibly small, affordable, portable, and easy to clean, checking all the boxes for dorm living.
Can you froth non-dairy milk like almond or oat milk?
Absolutely! Oat milk (especially barista blends) froths beautifully and is a favorite for its creamy texture. Soy milk also works well. Almond milk can be a bit trickier, but you can still get a decent foam from it.
Do I need an expensive milk frother to get good results?
Not at all. You can get a high-quality, reliable handheld milk frother for under $20. The key to great foam is more about your technique and the type of milk you use than the price of the device.
Can a handheld milk frother also heat the milk?
No, handheld frothers do not have a heating element. You will need to heat your milk separately in a microwave or on a stovetop before frothing it. Only automatic electric jug frothers can heat and froth simultaneously.
How long does it take to froth milk with a handheld frother?
It’s incredibly fast! Once your milk is heated, it typically takes only 20 to 30 seconds to create a rich, thick foam with a handheld frother.
Your Dorm Room Café Awaits
Making the decision to buy a compact Milk Frother for dorm life is about more than just coffee; it’s about reclaiming your mornings, saving money, and adding a small touch of everyday luxury to your student experience. It’s a small investment that pays for itself in just a few uses, transforming your tiny room into your own personal café. So go ahead, start experimenting with different milks and drinks, and discover the simple joy of a perfectly crafted beverage, made by you, for you.