Let’s be honest, that morning trip to the coffee shop hits the wallet harder than we’d like to admit. You crave that velvety, cloud-like foam on your latte, but the daily cost adds up. What if I told you the secret to cafe-quality drinks is hiding in plain sight, and it costs less than a week’s worth of your usual coffee orders? This comprehensive Budget Milk Frother Review is your ticket to becoming your own favorite barista, without breaking the bank. Imagine starting your day with a perfect, home-brewed cappuccino, the rich espresso mingling with a thick layer of creamy microfoam you whipped up in seconds. It’s not a dream; it’s your new reality.
Why You Absolutely Need a Milk Frother (Even on a Budget)
A milk frother might seem like a niche, “nice-to-have” gadget, but for any coffee or tea lover, it’s a total game-changer. It’s the single most affordable tool that dramatically elevates your home beverage experience.
Think of it this way: you’ve already invested in good coffee beans and a brewing method you love. The frother is the final, transformative step that takes your drink from a simple “cup of coffee” to a luxurious, multi-sensory experience. It’s about texture, temperature, and that little moment of indulgence that sets the tone for your whole day. A budget-friendly model gives you all that upside with minimal financial commitment.
The Three Main Types of Milk Frothers
Navigating the world of milk frothers can feel a little overwhelming at first, but it really boils down to three main contenders. Each has its own personality, and finding the right one is all about matching it to your lifestyle.
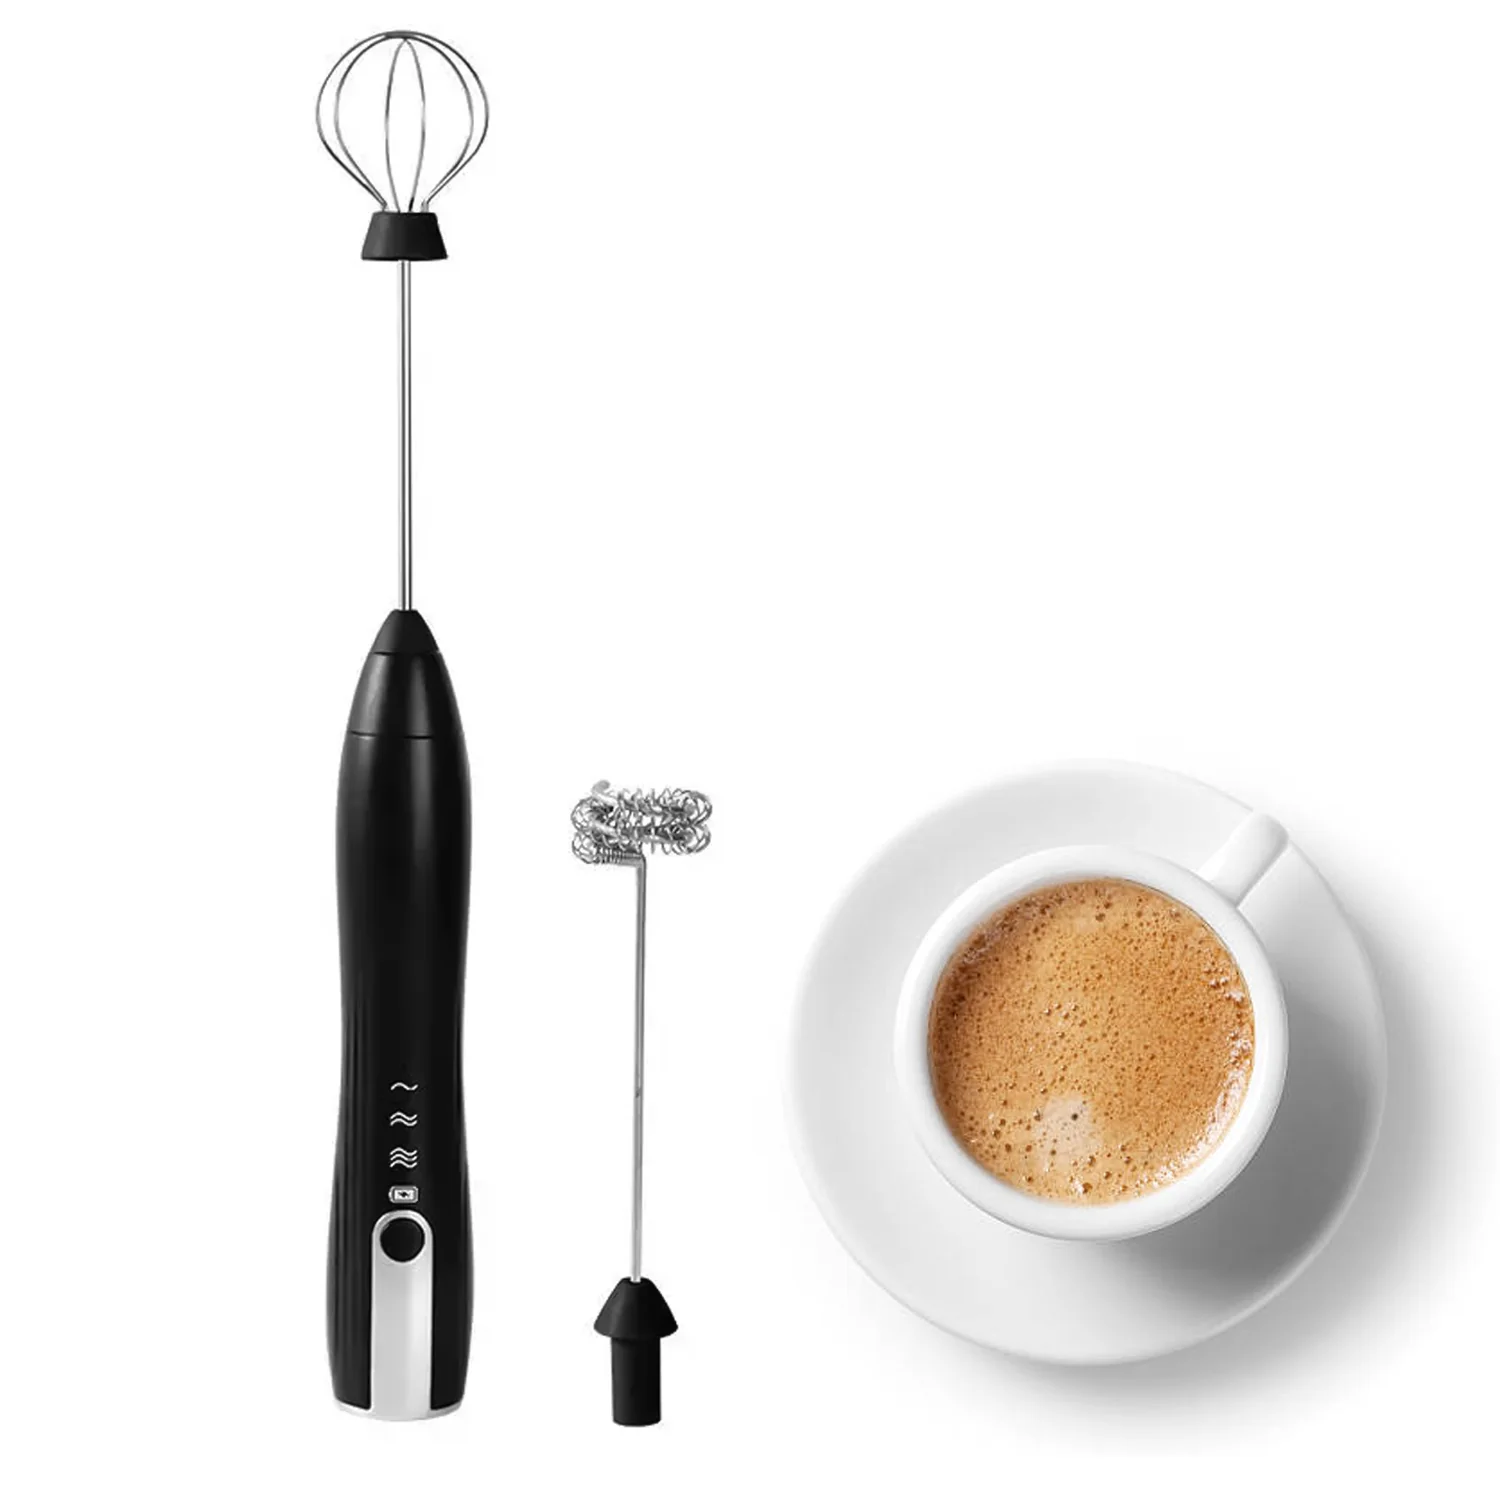
The Handheld Hero (Wand Frothers)
This is the little engine that could. A handheld frother is a small, battery-powered whisk that you dip directly into your milk. They are incredibly popular for a reason.
- Pros:
- Extremely Affordable: Often the cheapest option, you can find great ones for under $20.
- Compact & Portable: Takes up virtually no counter space and is easy to store in a drawer. You can even take it camping!
- Super Easy to Clean: Just a quick rinse under hot water and a spin is all it takes.
- Cons:
- Requires a Little Finesse: You have to hold it and control the frothing process yourself.
- Doesn’t Heat Milk: You’ll need to warm your milk in the microwave or on the stovetop first.
- Battery Dependent: They run on batteries, which will need replacing eventually.
Personal Take: My first frother was a simple handheld wand, and it completely changed my morning coffee ritual. It’s the perfect entry point for anyone curious about making lattes at home.
The Automatic Ace (Electric Jug Frothers)
If you’re looking for convenience and consistency, the automatic electric frother is your best friend. It’s a countertop appliance that looks like a small electric kettle. You pour in the milk, press a button, and it does all the work for you—heating and frothing simultaneously.
- Pros:
- Hands-Free Operation: Set it and forget it. Perfect for busy mornings.
- Heats and Froths: Delivers perfectly textured, hot foam every single time. Many also have a cold foam setting.
- Consistent Results: No guesswork involved; you get the same quality foam with every use.
- Cons:
- Higher Price Point: They are more expensive than handheld models, though budget options are increasingly available.
- Takes Up Counter Space: It’s a small appliance you’ll need to find a home for.
- More Involved Cleaning: Usually involves washing the jug and whisk component.
The Manual Master (French Press Style)
For the purists who enjoy a hands-on approach, the manual frother—which often looks just like a small French press—is a fantastic, electricity-free option. You pour warm milk into the container and pump a plunger with a mesh screen up and down to create foam.
- Pros:
- Excellent Control: You can feel the foam developing and stop exactly when it reaches your desired consistency.
- No Power Needed: Great for off-grid living, travel, or just a simpler kitchen setup.
- Creates Silky Microfoam: Many baristas argue that this method produces some of the best-quality foam for latte art.
- Cons:
- Requires Physical Effort: It’s a mini-workout for your arm!
- Learning Curve: It might take a few tries to perfect your technique.
- Doesn’t Heat Milk: Like the handheld, you have to heat your milk separately.
How to Choose the Best Budget Milk Frother for Your Needs
Finding the perfect frother is less about finding the “best” one overall and more about finding the best one for you. Before you buy, run through this quick checklist:
- What’s Your Morning Routine Like? If you’re always in a rush, an automatic frother is a lifesaver. If you enjoy the ritual of making coffee, a handheld or manual frother might be more satisfying.
- How Much Space Do You Have? For tiny kitchens or dorm rooms, a handheld wand is the undeniable winner. If you have a dedicated coffee station, an electric jug will fit right in.
- What Drinks Will You Be Making? Just need a little foam for your drip coffee? A handheld is perfect. Aspiring to make complex lattes and cappuccinos? An automatic or manual model might give you better results.
- How Important is Cleaning? Be honest with yourself. If you hate doing dishes, the 10-second cleanup of a handheld frother will be a huge plus.
|
Our Picks for the Best Milk Frother in 2026
As an Amazon Associate, we earn from qualifying purchases.
|
||
| Num | Product | Action |
|---|---|---|
| 1 | Maestri House Rechargeable Milk Frother with Stand, LunaFro Handheld Electric Foam Maker Waterproof Detachable Stainless Steel Whisk Drink Mixer Foamer for Lattes, Cappuccino |

|
| 2 | Bean Envy Milk Frother Handheld for Coffee - Mini Drink Mixer Whisk & Coffee Foamer Wand with Stand for Lattes, Cappuccino, Matcha and Hot Chocolate - Kitchen Gifts - Black |
|
| 3 | Milk Frother Handheld Battery, Electric Foam Maker Frother Wand, Drink Mixer with Stainless Steel Whisk for Coffee, Matcha, Lattes, Cappuccino Black |
|
| 4 | YUSWKO Black Handheld Milk Frother Wand for Coffee, Rechargeable Electric Whisk with 3 Heads 3 Speeds Drink Mixer Coffee Frother For Latte, Cappuccino, Hot Chocolate, Egg |
|
| 5 | Zulay Kitchen Milk Frother Wand Drink Mixer with AA Duracell Batteries- Durable Handheld Milk Frother Electric Whisk - Easy-Clean Milk Frother Wand & Mini Blender - Electric Coffee Frother - Black |
|
| 6 | Milk Frother Handheld Rechargeable, Frother Wand Drink Mixer Electric Whisk for Coffee, Detachable With 3 Stainless Whisks, Hand Mixer for Lattes, Cappuccino, Matcha, Egg, No Stand, Black |
|
| 7 | Powerful Milk Frother Wand - Mini Handheld Milk Frother with Stainless Steel Whisk - Battery-Powered Drink Mixer for Coffee, Lattes, Cappuccinos, Matcha - Coffee Enthusiasts Gift - Black |
|
| 8 | Milk Frother Handheld for Coffee (Foam Maker) Whisk Drink Mixer for Lattes, Cappuccino, Frappe, Matcha, Hot Chocolate |
|
| 9 | Zulay Kitchen Powerful Milk Frother Wand With 2 Duracell Batteries - Ultra Fast Handheld Drink Mixer - Electric Whisk Foam Maker for Coffee, Lattes, Cappuccino, Matcha, Hot Chocolate & Creamer - Black |
|
| 10 | Maestri House Rechargeable Milk Frother, LunaFro Mini Handheld Electric Foam Maker Detachable Stainless Steel Whisk Drink Mixer Foamer Mini Blender for Matcha, Lattes, Cappuccino, No Stand |
|
Your Step-by-Step Guide to Flawless Foam
You’ve picked your frother, now what? Getting that perfect, creamy foam is a science, but it’s an easy one to master.
- Choose Your Milk: Whole milk is the undisputed king for frothing due to its ideal balance of fat and protein. For non-dairy options, “barista blend” oat milk is a superstar. Almond and soy can also work well, but results may vary. Check out our [in-depth guide to the best milks for frothing] for more details.
- Get the Temperature Right: For hot foam, you’re aiming for around 140-150°F (60-65°C). Any hotter and the milk can scald, affecting the taste and texture. A good rule of thumb is to heat it until the container is hot to the touch, but not so hot you have to pull your hand away.
- Aerate First, Then Mix: Start with the whisk or plunger near the surface of the milk. This introduces air and creates volume. You’ll hear a slight “sucking” sound.
- Create the Vortex: Once the milk has increased in volume by about 30-50%, submerge the whisk deeper into the milk. Tilt your cup or jug slightly to create a swirling vortex. This breaks down large bubbles into a silky, uniform microfoam.
- Tap and Swirl: After frothing, gently tap the container on the counter a few times to pop any remaining large bubbles. Give it a final swirl to incorporate the foam and milk before pouring.
Pro Tips for Unlocking Cafe-Quality Foam
Ready to take your skills to the next level? Here are a few tricks of the trade.
“The biggest mistake beginners make is over-aerating the milk. You want to introduce air gently at the start, then focus on spinning that milk into a velvety paint-like texture. That’s the secret to foam that not only sits on top of your coffee but blends with it beautifully.” – Maria Flores, Certified Barista and Coffee Consultant
- Always Start with Cold Milk: Even if you’re making hot foam, starting with very cold milk gives you more time to work with it before it reaches the ideal temperature. This extra time allows you to build a more stable and fine-textured foam.
- Don’t Overfill: Milk will nearly double in volume when frothed. Only fill your cup or frothing jug about one-third of the way full to avoid a messy overflow.
- Fat is Flavor, Protein is Structure: Remember this. The proteins in milk create the bubble structure, while the fat adds creaminess and richness. This is why skim milk can create a lot of stiff, airy foam, but it often lacks flavor and has a dry texture.
Beyond the Coffee Cup: Creative Uses for Your Frother
Your new gadget isn’t just a one-trick pony! A budget milk frother review wouldn’t be complete without highlighting its versatility. Use it to:
- Whip up a Matcha Latte: Perfectly blend matcha powder into hot water or milk, eliminating all clumps.
- Make Indulgent Hot Chocolate: Froth your milk after you’ve mixed in the chocolate for an incredibly airy and decadent treat.
- Mix Powdered Drinks: Protein shakes, collagen powders, or greens supplements blend in seconds.
- Create Simple Salad Dressings: Emulsify oil and vinegar for a quick vinaigrette.
- Whisk Eggs: In a pinch, it can be used to lightly whisk an egg for an omelet.
Keeping It Clean: How to Maintain Your Milk Frother
Proper care is key to making your budget-friendly tool last.
- Clean Immediately: Milk residue is much harder to remove once it dries. Clean your frother right after you use it.
- Handheld Wands: Simply turn it on in a glass of hot, soapy water for a few seconds, then rinse with clean water.
- Automatic Jugs: Follow the manufacturer’s instructions. Most have non-stick interiors that are easy to wipe out with a soft cloth. Avoid abrasive sponges.
- Manual Frothers: Disassemble the plunger and wash all parts in warm, soapy water.
FAQ: Your Budget Milk Frother Questions Answered
What is the best type of milk for frothing on a budget?
Whole cow’s milk consistently provides the best and most reliable foam for the lowest cost. It has the perfect protein-to-fat ratio for creating a rich, stable, and creamy texture. If you prefer non-dairy, oat milk is generally the best performer.
Can a cheap milk frother make hot foam?
A cheap handheld frother cannot heat milk on its own; you must warm the milk separately first. However, many affordable automatic electric frothers have a heating function built-in, providing an all-in-one solution for hot foam.
How long does it take to froth milk with a handheld frother?
It’s incredibly fast! With a decent handheld frother, you can create beautiful foam from warm milk in about 20 to 30 seconds. The key is to start at the surface to build volume and then submerge the whisk to refine the texture.
Is it worth buying a budget milk frother?
Absolutely. For a very small investment, a budget milk frother can completely transform your home coffee, matcha, or hot chocolate experience. It allows you to replicate expensive cafe-style drinks at home, saving you a significant amount of money in the long run.
How do I get thick foam from my frother?
To get thicker foam, use fresh, cold, whole milk. The higher protein and fat content creates a more stable and dense foam. Also, ensure you spend enough time aerating the milk at the surface before submerging the whisk to create the microfoam.
Your Home Cafe Awaits
After this deep dive and budget Milk Frother review, it’s clear that you don’t need to spend a fortune to seriously upgrade your daily coffee. For less than the price of a few lattes, you can unlock a world of creamy, dreamy beverages made exactly to your liking. It’s a small tool that delivers a huge return in joy and savings. So go ahead, grab a frother, and start your journey to becoming the master of your own home cafe. You deserve it.